
How to make a cushion cover with a zipper
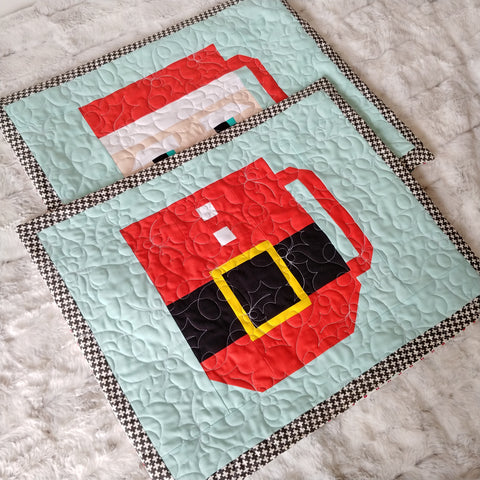
Recently I made these cushion covers from my new Christmas block patterns. (CHRISTMAS SANTA SUIT MUG & VINTAGE SANTA MUG) And I'm going to show you how to turn the blocks into these cute cushion covers!
Here is the tutorial. Please read it before you start a project.
To complete the cushion cover top

You need:
The inner borders (background)
A (2) 4 1/2" x 12 1/2" rectangles
B (2) 2 1/2" x 20 1/2" rectangles
The outer borders (accent)
C (2) 1 3/4" x 16 1/2" rectangles
D (2) 1 3/4" x 23" rectangles
For the quilt sandwich
(1) Lining fabric 22" x 26"
(1) Batting 21" x 25"
- Right sides together (RST), piece Rectangles A to the both right and left sides of 12" x 12" mug block, press toward outside.
- RST, piece Rectangles B to the top and bottom of the unit from Step 1, press toward outside.
- RST, piece Rectangles C to the both right and left sides of the unit from Step 2, press toward outside.
- RST, piece Rectangles D to the top and bottom of the unit from Step 3, press toward outside. Unfinished cushion top size is 19" x 23".
- Layer the lining fabric, batting and completed cushion top to make a quilt sandwich. Baste and quilt as desired. Trim away the excess batting and lining fabric.
NOTE: I used a piece of fabric for the backing of the cushion but feel free to quilt the backing as well. If so, you need an extra lining fabric and batting.
To attach the zipper and complete the cushion cover

You need:
(1) Quilted cushion top
(1) Backing fabric 19" x 23"
(1) 18" Zipper

I used COATS & CLARK 18" zipper.

Gather the quilted cushion top and the backing fabric. Mark 2 1/2" from both end of the bottom of the cushion. RST, pin the bottom side of the cushion cover and the backing to secure.

NOTE: After quilting the cushion top, mine got shrank a little. So I had to trim the backing fabric to the same size of the top.

RST, sew from the edge to the 2 1/2" marked point using 1/2in seam allowance. Use the back stitch at the start and finish to secure. I sew back and force a multiple times to secure even more at the 2 1/2" marked point so that when I put the cushion insert to the cover, it doesn't rip. Repeat the steps with the other edge.

Stitch between the 2 1/2" marks using the long basting length (4.0 or more) with 1/2in seam allowance. No need to use the back stitches.

Press seam open.

With the wrong side up, place the zipper facing down onto the basted stitch part. Secure the zipper with the pins.

Stitch along the edges of the zipper using a zipper foot. Start sewing at the end of the zipper using back stitch to secure.

When you approach the zipper head, stop sewing, place the needle in the down position and move the zipper head out of the way. Stitch all sides of the zipper.

Turn the cushion cover piece to the right side. Remove the basting threads over the zipper carefully using a seam ripper. Make sure that you stop at both of the 2 1/2" marked point.

TIP: Use the pin on the end of the basting stich (2 1/2" marked point) so that you don't go over the 2 1/2" marked point with the seam ripper by accident!

My favorite part. Now you can see the zipper!


Open the zipper half way. RST, sew the top and both sides of the cushion cover and backing fabric with 1/2in seam allowance. Trim the corners. Make sure that you don’t cut the stitch part.

Use zig-zag stiches to secure the raw edges.

Turn the cushion cover right side out.

Done!!!

I hope you enjoy this tutorial! Happy sewing!